
How to paint a room

Here I will provide a guide to painting a room. Every room is different, so this is just a general guide for painting the ceilings, walls and woodwork in an average sized room in a house. It is assumed that minimal preparation is required and that all surfaces have been previously painted. In the guide I will provide information about:
-Health and Safety
-The tools and equipment that you will need
-The type paint that you will need
-How much Paint you will need
-Undertaking the Work
-Tips
HEALTH AND SAFTEY

Before starting work, make sure you read the health and safety advice for painting and decorating from the Construction Industry Training Board here.
Important Points to consider in particular:
-Using a step ladder – make sure that someone supports the step ladder when you are using it. Always make sure you have three points of contact (both your feet and one of your hands). Never over-stretch.
-Beware of putting the feet of ladders on top of dust sheets that have been placed on top of hard floors. This use of dust sheets on hard floors can cause the feet of the ladder to slide.
-Always wear a dust mask (p3 grade) and protective eyewear when sanding any surfaces. Beware of lead paint. Lead is a hazardous substance and if dust that contains lead is breathed in or swallowed can have serious health implications. Although lead is no longer used in today’s paints, it can be present in properties built before the 1960s.
-If you encounter any asbestos then take care not to sand, cut it or disturb it in anyway as breathing in asbestos dust particles can be hazardous. If in doubt then ask an expert.
-Never remove plug and light switch socket covers as this will expose bare wires and can lead to electric shock.
-It is recommended to use protective eyewear when rolling ceilings in order to prevent paint from getting in your eyes.
EQUIPMENT THAT YOU WILL NEED:

-Step Ladder (depending on how high your ceiling is)
-Dust Sheets (I usually use cotton dustsheets for the floor and new polythene sheeting for furniture and objects in the room)
-Screw drivers (for removing fixtures from walls)
-Dust mask (P3 standard)
-Dusting Brush
-Masking Tape 2” wide
-Sandpaper – Grade 80 and 120 (you may also need grade 60 if there are some very rough areas that require sanding).
-Filler for the woodwork – I recommend using a 2-part filler for the woodwork (there are a variety of different types of filler available– I like to use one made by Tetrion)
-Filler for the ceilings/walls. You can buy either a powdered filler that you mix with water or a ready-mixed filler. I like to use a ready-mixed, lightweight filler made by Red Devil called ‘Onetime’ which is good for both fine filling and for large holes.
-Filling knife (if you only buy one, then I’d recommend a 2” wide filling knife)
-Scraper (it’s like a filling knife but stiffer)
-White Caulk and a caulk gun – caulk is used for filling cracks in internal corners, for example between the ceiling and walls or between the skirting board and the wall. The advantage of using caulk is that it is flexible, quick to apply and doesn’t require sanding. I like ‘No nonsense’ Caulk which can be bought from Screwfix and various other stores.
-Stanley Knife – for cutting the nozzle of the caulk tube
-Disposable gloves (optional)
-Stain block (depending on whether you have any water stains or felt pen stains that will bleed through the emulsion paint. If required then Zinsser Coverstain is a good oil-based stain block)
-White spirit (if using oil based paint on the woodwork (see below)
-Painter’s hand wipes (available from most decorator’s merchants)
-Brushes. You’ll need at least one brush for the ceiling and walls (anywhere between 2-3” wide) and at least one brush for the woodwork (a 2” brush would be a good ‘all-rounder for painting large surfaces like doors as well as for cutting-in skirting boards etc. The brush for the walls could be made of natural bristles, synthetic bristles or a mix of the two. The type of brush that you will require for the woodwork will depend on the type of paint that you are using. If using water-based paint then either type of brush is fine and if using an oil-based paint then a natural bristle brush will always be fine and a synthetic bristles brush may be ok depending on the brand.
-Roller sleeve. You’ll need at least one roller sleeve. A 9”one is probably best, and while there are some good, cheap synthetic ones on the market, I prefer to spend slightly more and use Sheepskin rollers as they provide a good finish and are easier to clean afterwards.
-Roller Frame.
-Roller pole. Make sure that it fits the roller frame that you buy. If the pole has a screw fitting at the end then you’ll either need a roller frame that accepts this or you will need to buy an adapter. If you are planning to do a lot of decorating then it’s worth spending a bit more and buying a decent pole as the cheaper ones tend to break quickly.
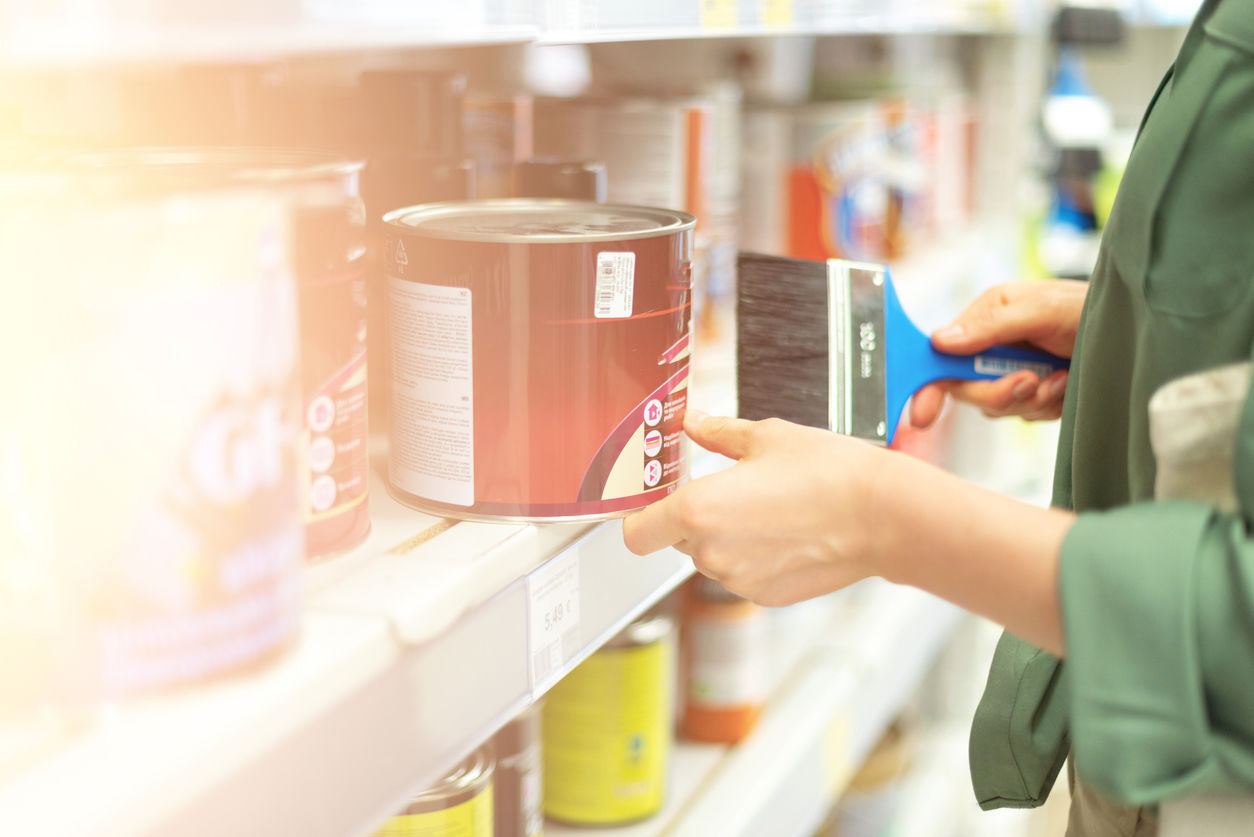
CHOOSING THE TYPE OF PAINT:
Kitchens/Bathrooms:
If you are painting a kitchen or bathroom then you might want to consider a wipeable finish on the ceiling and walls. As well as having the benefit that dirt and stains can be easily removed, I tend to recommend this in small bathrooms that do not have windows, because the steam from the shower can cause standard matt paint to become temporarily transparent and to show up areas that have been filled. In terms of wipeable finishes, there are three options:
-Silk emulsion – this is a very shiny finish and a bit unfashionable these days
-Mid-sheen emulsion (self-explanatory)
-Wipeable matt emulsion such as Dulux ‘Diamond Matt’
(I tend to recommend the last option as it looks much more attractive.)
Ceilings:
Daylight usually hits ceilings from a sideways angle and this can sometimes mean that it show up roller marks if the paint has even a slight sheen. For this reason, in living rooms, bedrooms and hallways, , I tend to either use Dulux ‘Flat Matt’ emulsion or Johnstone’s Perfect Matt emulsion, as they tend to solve this problem.
Walls:
If the walls are bare plaster then you’ll need to thin the paint down first and you can learn about how to do this in my other blog post. Assuming that the walls have been previously painted, I recommend using a ‘vinyl matt’ paint which is more durable than a standard ‘contract matt’ paint but with a similar sheen level. I tend to use Dulux Trade emulsion for walls as it provides a good finish/coverage.

Woodwork:
There are two different types of paint then can be used when painting the woodwork; oil-based or water-based/acrylic paint.
Oil-Based Paint
Pros:
-Covers better than water-based paint
-Adheres well to most surfaces
Cons:
-Can be difficult for beginners to use
-Longer drying time
-Will ‘yellow’ over time, particularly in rooms with little/no natural daylight
Water-based Paint:
Pros:
-Easier and quicker to apply
-Dries quickly (2 or more coats can be applied in one day)
-Stays whiter longer
Cons:
-It doesn’t cover as well as oil-based paint so requires more coats
-With some brands it’s difficult to hide brushstrokes
-It doesn’t stick as well to glossy surfaces (though this problem can be solved by sanding the surface first and using an appropriate primer).
If you have very little experience with painting and decorating then I’d recommend that you use a water-based paint as it is easier to use and will yellow far less over time.
Gloss, Satin or eggshell?
Satin and eggshell are less shiny than gloss paint. In the past, eggshell was the most matt finish but these days there is not really any difference in finish between satin and matt. Regardless of which finish you choose, I recommend using a coat of undercoat first as it will adhere better to the previously painted surface and since it is more opaque than gloss or satin, it will mean that you will need to apply fewer coats of paint. The usual finishing process after your undercoat has been applied is either one coat of gloss paint or one or two coats of Satin/Eggshell.
HOW MUCH PAINT WILL I NEED TO PAINT A ROOM?
Every room is different so it’s impossible to provide a definite answer to this question, but let's assume it is an average sized, living room with a door, a couple of windows, a fireplace surround and skirting boards. Based on that assumption you’ll need the following:
Ceiling – 2.5 - 5 litres of emulsion for 2 coats of paint
Walls - 5 litres of emulsion for 2 coats of paint
Woodwork – Assuming that you will be applying one coat of undercoat and one top coat, I’d recommend that you begin with a litre of each.
STEP-BY-STEP GUIDE TO PAINTING A ROOM

1. Begin by removing as many possessions as possible from the room. Take down all pictures and curtains. Remove door handles etc.
2. Next, protect the floor and any furniture that remains in the room with dustsheets. If using cotton sheets then you may need to double them up to prevent any paint from bleeding through.
3. Bring any tools that you will need for the preparation in the room. Leave paint, brushes and rollers out of the room for the time being as the preparation may produce some dust.
PREPARING THE CEILING AND WALLS:
4. Put on your dust mask and protective eyewear and begin by preparing the ceiling first and then the walls. Identify any hairline cracks and using a scraper, open these up/widen them slightly. This is to help the filler that you will apply later to enter the cracks better. If you see any rough areas then these can usually be removes by either sanding with the P80 sandpaper (orP60 if very rough) or scraping . If you encounter any flaking paint then now is a good tie to scrape it back to a hard edge. Once you have raked out any cracks and sanded and scraped rough areas, then take a dusting brush and remove any dust.
5. Using a filling knife, fill any cracks and holes and leave to dry.
6. Using the caulk gun, apply caulk to any internal corners, for example between the walls and ceiling. Run a continuous bead a metre long and then using your finger, smooth the caulk. It is useful to wear plastic gloves when doing this and to have a bucket of water and rag handy so that you can clean your finger regularly.
PREPARING THE WOODWORK:
7. While the filler and caulk is drying, put on your dust mask and protective eyewear again and lightly sand the woodwork with the p120 sandpaper (assuming that it has been previously painted). The aim is not to remove the paint, but to provide a key for the coats of paint hat you will apply. Giving the woodwork a light sand will help the undercoat to adhere properly.
8. You may need to rake out any cracks that you encounter in the woodwork in the same way that you did with the ceilings and walls. If you see any flaking paint then scrape this off too.
9. Dust off your woodwork with a dusting brush ready for filling.
10. Mix your two-part filler using the instructions on the pack. I use a special board called an onion board for mixing my filler on, but you could use the back of a piece of sandpaper or a piece of cardboard.
11. Unlike other types of filler, two-part filler dries using a chemical reaction rather than by evaporation. And it dries very quickly – usually within 5 or 10 minutes. Remove no more than a ‘golf ball’ sized amount of filler from the tin and put it on the surface that you will use to mix it on. If you mix any more than this then it is unlikely that you will have time to use it before it goes rock hard.
12. Mixing the two-part filler. When you have added the hardener to the filler, then mix it thoroughly with a filling knife. I usually mix it for between 30 seconds and one minute. If you don’t mix it for long enough then there is a risk that it will not ‘go off’ properly and will not become rock hard.
13. Apply your two-part filler to any cracks in the woodwork and leave to go off.
FINISHING THE PREPERATION
14. Assuming that the filler you applied to the ceiling and walls is dry, give it a sand and then dust off these areas with your dusting brush (taking care to wear your dust mask).
15. Sand the two-part filler that you applied to the woodwork and then dust these areas and wipe down the woodwork with a damp cloth and leave to dry.
16. Fill any internal corners with the caulk (for example where the skirting boards meet the walls, or around any the panels in doors) and smooth off.
17. Now is a good time to remove your dustsheets and give them a shake out outside and vacuum the floor. You want to remove all dust and mess before you begin painting.
18. Replace the dust sheets and bring into the room the paint for the ceiling and the roller, tray and pole. If you have had any leaks in the past then now is a good time to apply a couple of coats of stain block to affected areas.
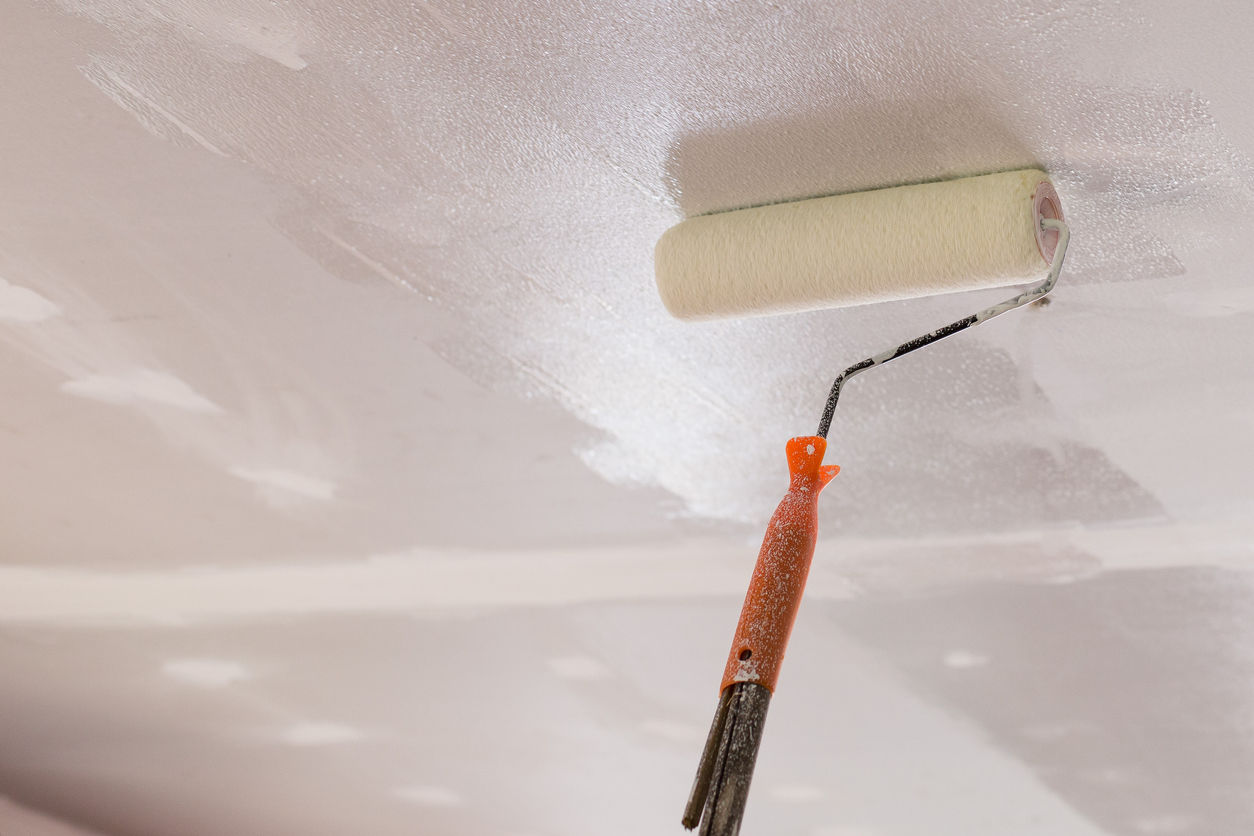
PAINTING THE CEILING
19. Pour your paint into a paint kettle and begin painting the edges of the ceiling and around any down lights. When you have painted the edges you are ready to roll the ceiling.
20. Pour your paint into the tray and attach your roller to the pole. Ideally, it’s best to begin where any windows are and roll backwards in the opposite direction. This is because the daylight will reflect in the wet paint and it will make it easier to see if you have missed any areas. I recommend wearing a hat and protective eyewear while you do this in case you spray any paint towards yourself.
21. After the first coat of paint has dried, then check to see if you require a second coat. Often two coats are required.
PAINTING THE WALLS
22. Begin by ‘cutting-in’ the walls (painting the edges of the walls with a brush). You can ready my article on how to do this here.
23. Once you have cut in, you’ll want to roll the walls. Start at the top and roll down in the direction of the floor. Roll a small area and then move along and continue. Take care to ensure that the dust sheets have not moved and that there isn’t a gap between the skirting boards and the sheet.
24. After the first coat has dried, check to see if a second coat is required. Usually at least two coats of paint are required.
PAINTING THE WOODWORK
25. Before you start painting, mask up the carpet at the bottom of the skirting boards. There is a general rule with painting and decorating that you should always work from top to bottom. There are exceptions to this of course, but in most cases it rings true. So when painting the woodwork in a room, begin with any items that are high up (loft hatches, picture rails for example) and leave skirting boards until last. This is because if you drip any paint when you are working, then you will notice it as you work your way down and you can brush it out or remove it. Also, you don’t want to paint the skirting boards first and then kick up lots of dust as you walk around the room painting the other items.
26. Apply one coat of undercoat to the woodwork first, and then when it has dried and is ready to re-coat, then apply either one coat of gloss paint or ½ coats of Satin/eggshell. If there is a strong colour change (for example your woodwork is currently painted grey and you want to paint it white) then apply several coats of undercoat before applying the top coat/s.
27. For tips on cutting-in, see my guide here. For tips on how to paint a door, see my guide here. Some of the techniques discussed in my guide to painting doors are also helpful for painting other flat surfaces.
28. When you have finished painting the woodwork and the paint has dried, screw back door handles, remove masking tape and remove your dust sheets and tools.
TOP TIPS:
-Paint the ceilings first, then the walls
-Paint the woodwork after the ceiling and walls
-Remember the rule; ‘Start at the top and work down’. Paint picture rails before skirting boards and the top of the door before the bottom of the door.
-If you’ll be painting your ceiling and walls over several days then wrap your brushes and rollers tightly in plastic bags to prevent the air getting to them and to stop the paint drying. This will avoid the need to wash them out every evening. You can also use this technique with the brushes you are using for the woodwork if you are using water-based paint on these surfaces too.
BACK TO BLOG
Follow US